DRIVER APP - instructions: Difference between revisions
No edit summary |
No edit summary |
||
| (2 intermediate revisions by the same user not shown) | |||
| Line 1: | Line 1: | ||
Video instruction about the work on Driver App in English http://cloud.necs.ca/s/SJsNAmc7m4WLkmq | |||
in Russian http://cloud.necs.ca/s/PEZQw2Hg6RGka4g | |||
==Sign-up to DriverApp== | ==Sign-up to DriverApp== | ||
Latest revision as of 14:22, 23 November 2023
Video instruction about the work on Driver App in English http://cloud.necs.ca/s/SJsNAmc7m4WLkmq
in Russian http://cloud.necs.ca/s/PEZQw2Hg6RGka4g
Sign-up to DriverApp
1. Go to https://new-driver.bloomex.ca
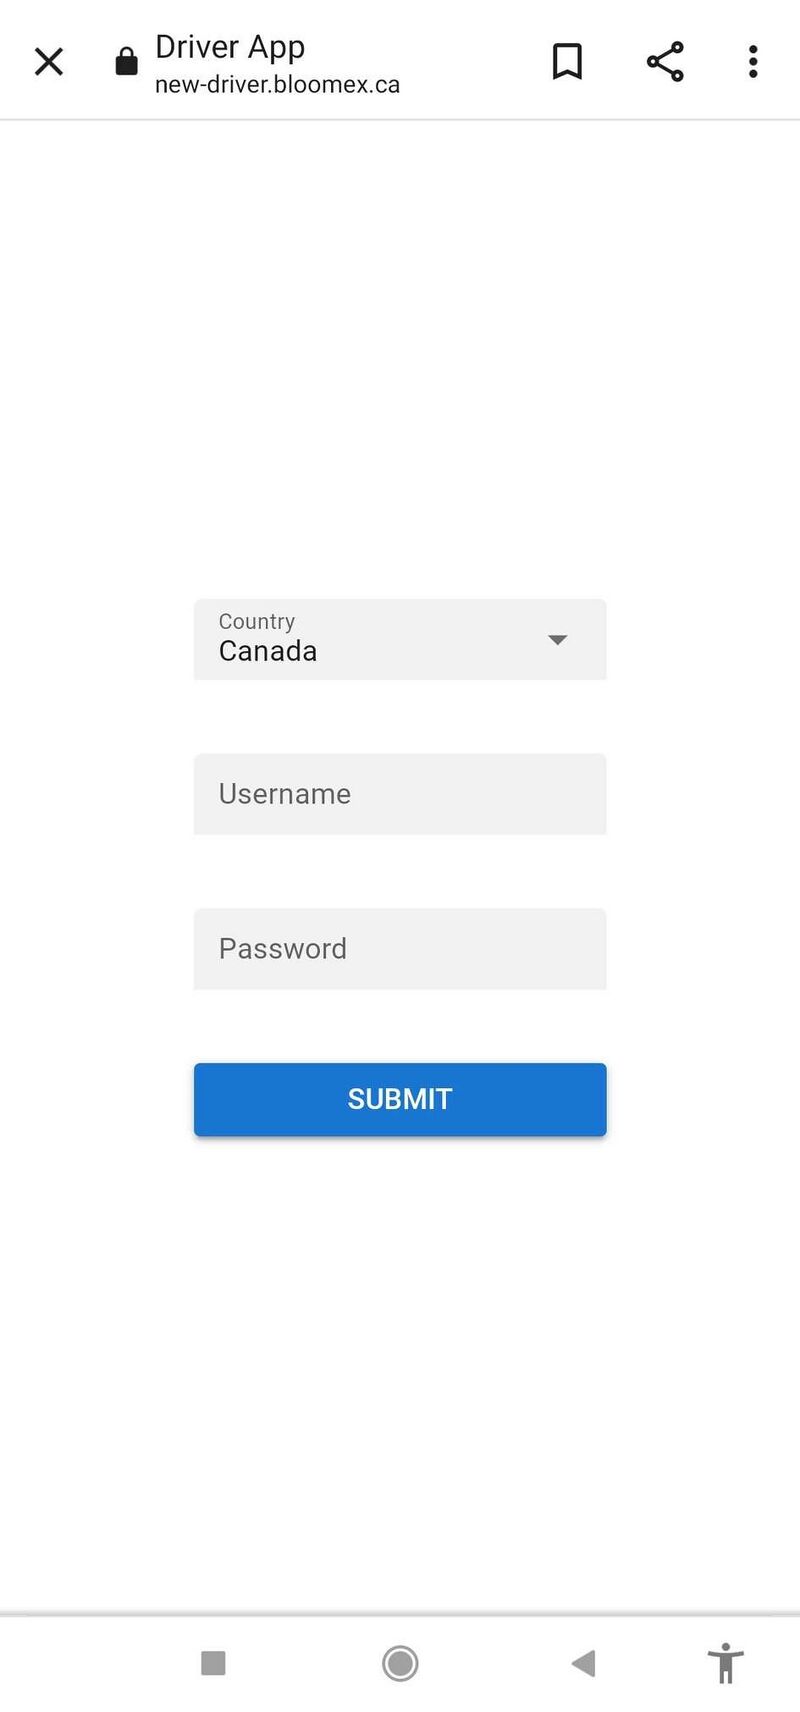

2. Choose your country from the drop-down list and fill in correct credentials in the "Username" and "Password" fields


3. Press the blue “SUBMIT” button
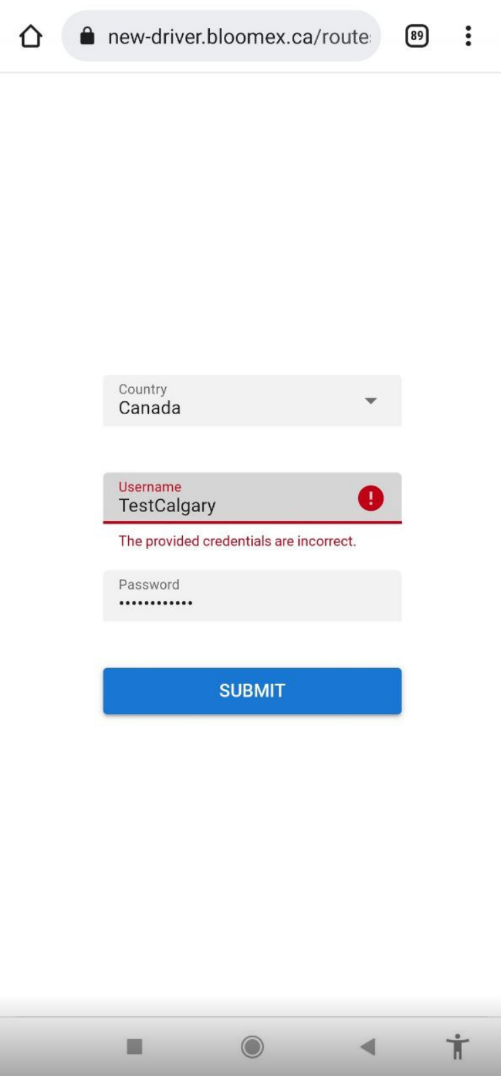

4. If wrong credentials are entered there “The provided credentials are incorrect” error will appear
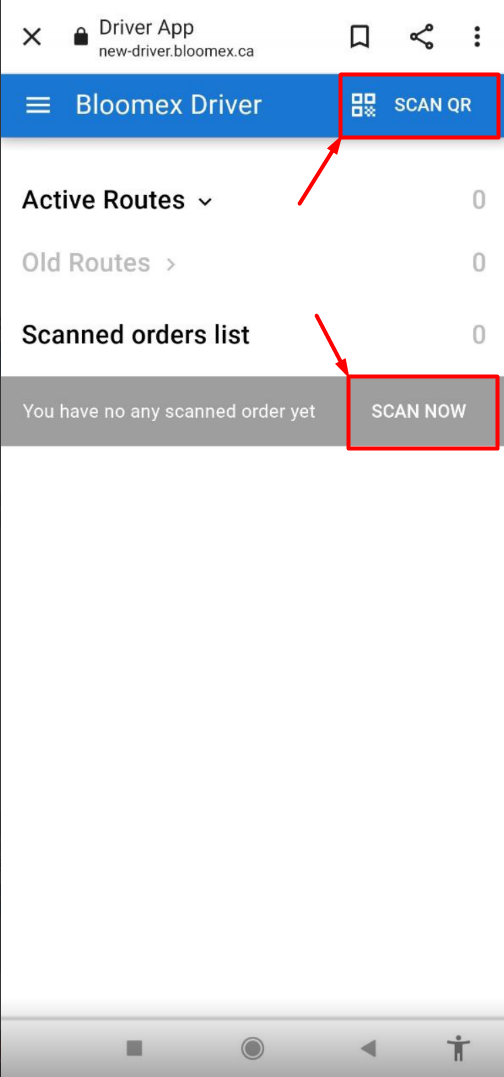
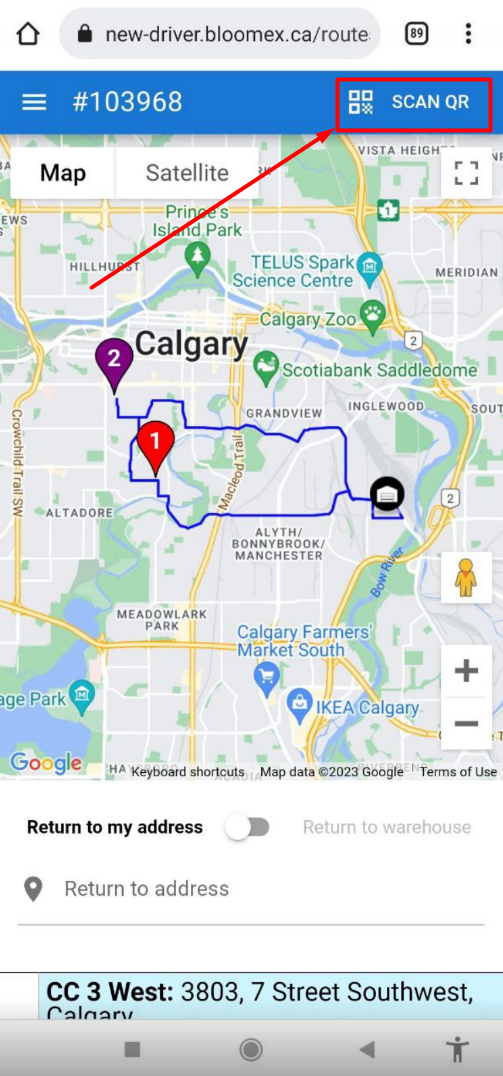
To create a new route:
1. Press the blue “SCAN QR” button in the upper right corner of the screen or click on the “SCAN NOW” button on the gray bar on the right

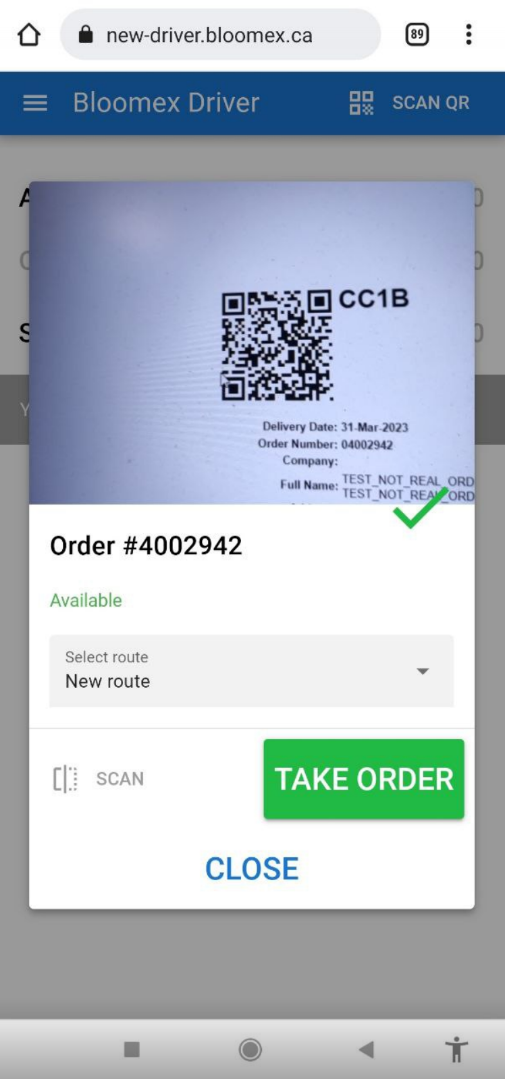
2. Point the phone camera at the QR code (on the NEW FORM label)
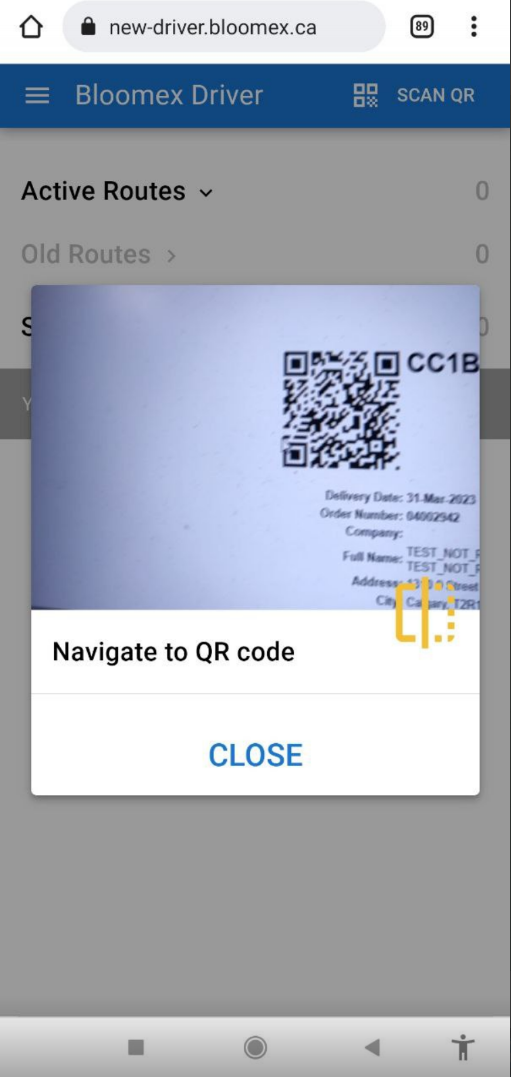

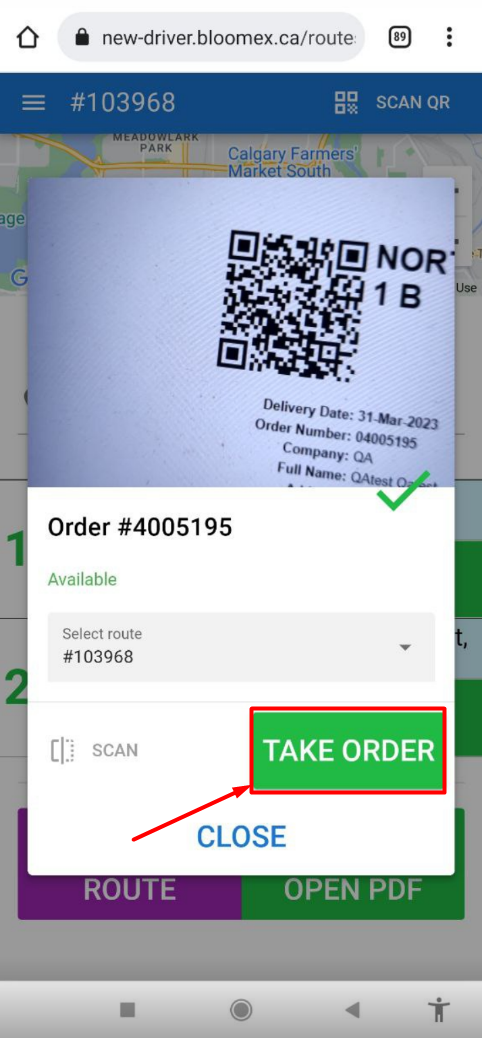
3. If the order has not yet been scanned and routed with it, a green checkmark will appear.

If the wrong country during login was chosen the Order load error may appear

.png)
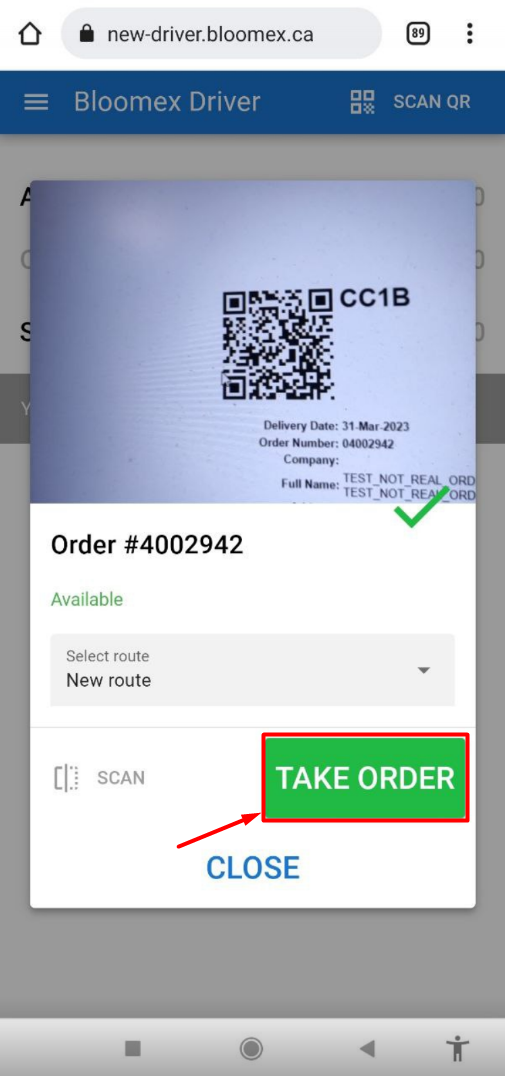
4. Press the green “TAKE ORDER” button.

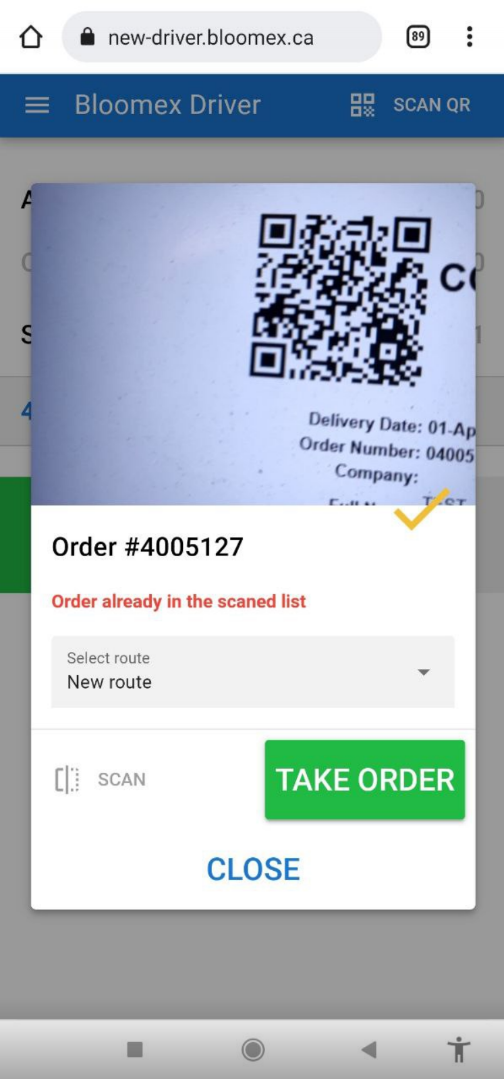
If the order has already been scanned an orange check mark and red text “Order already in the scaned list” will appear.
.png)
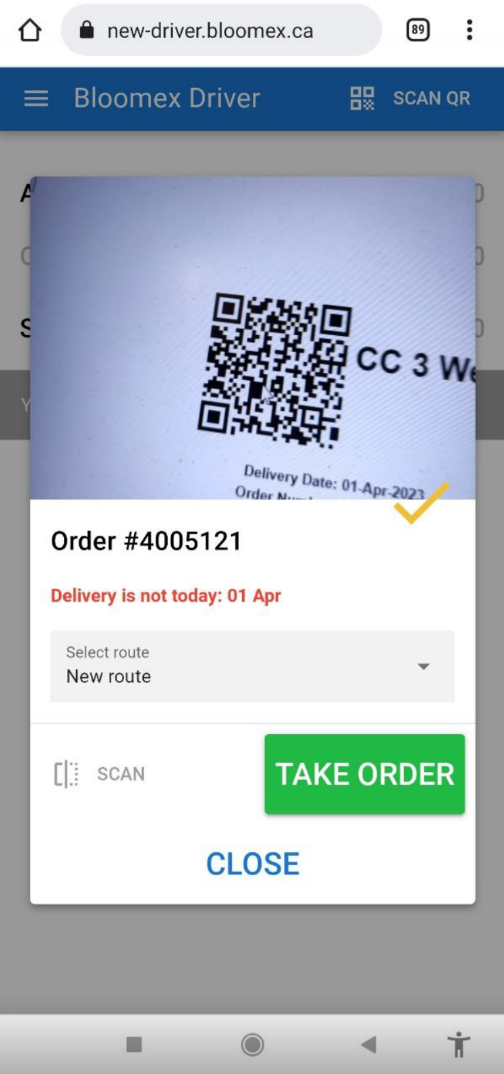
If delivery is not today an orange check mark and red text “Delivery is not today: Template:Day of order delivery” will appear.
.png)
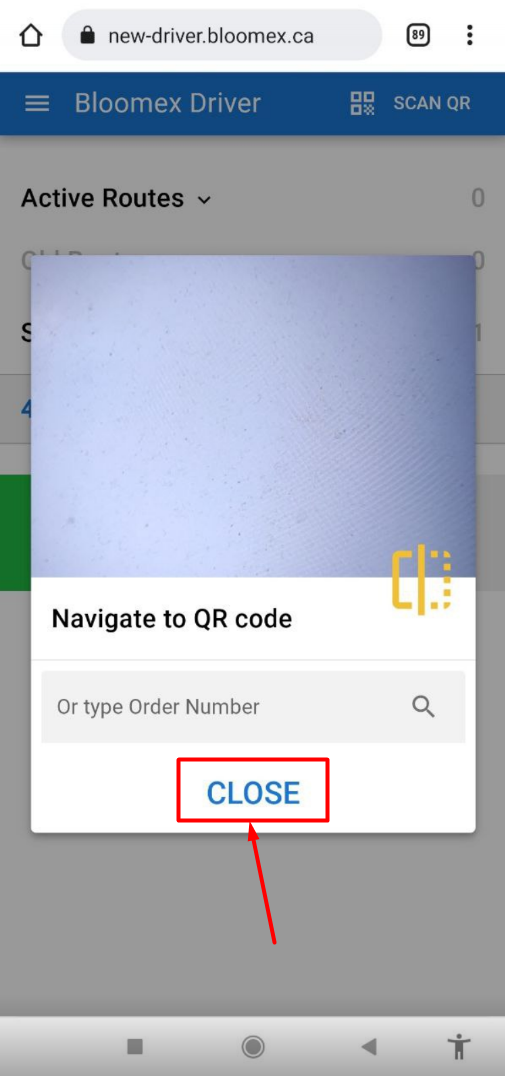
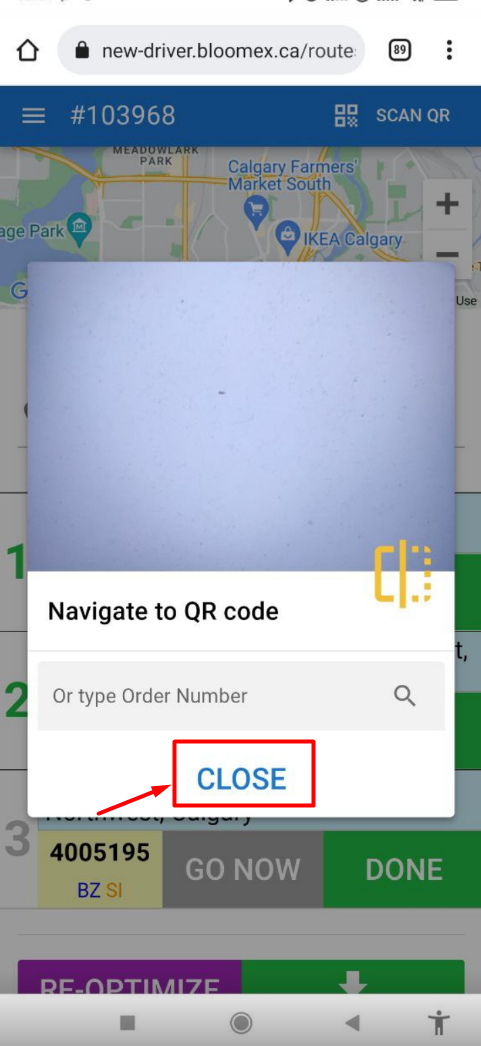
5. Scan all orders and press the “CLOSE” button

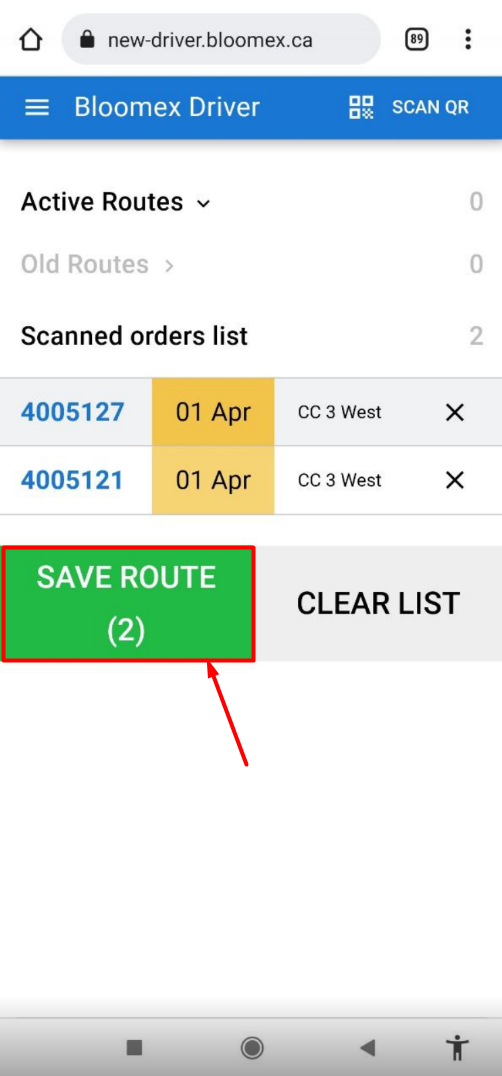
6. Press the green “SAVE ROUTE (1)” button

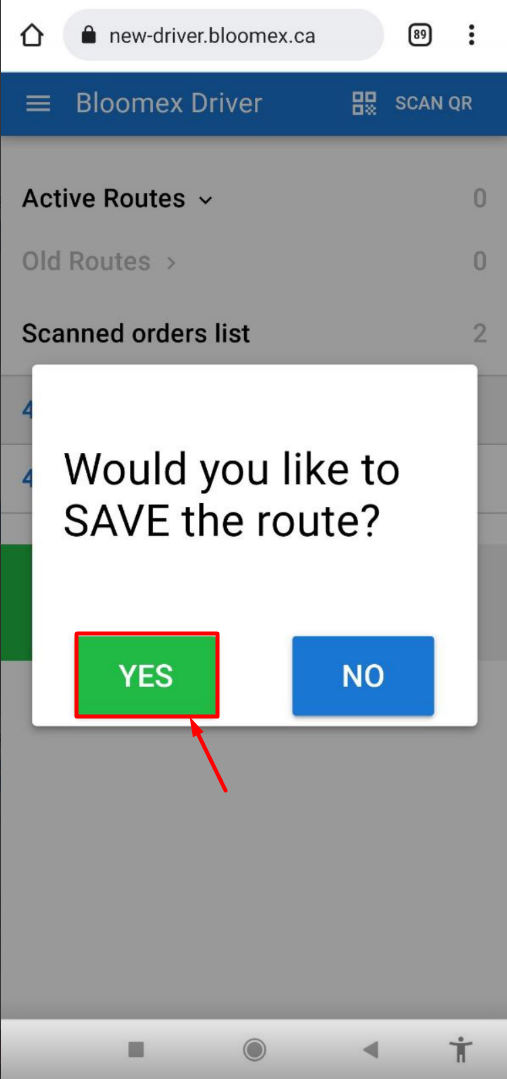
7. Press the green “YES” button

App should display map with route and information about orders.
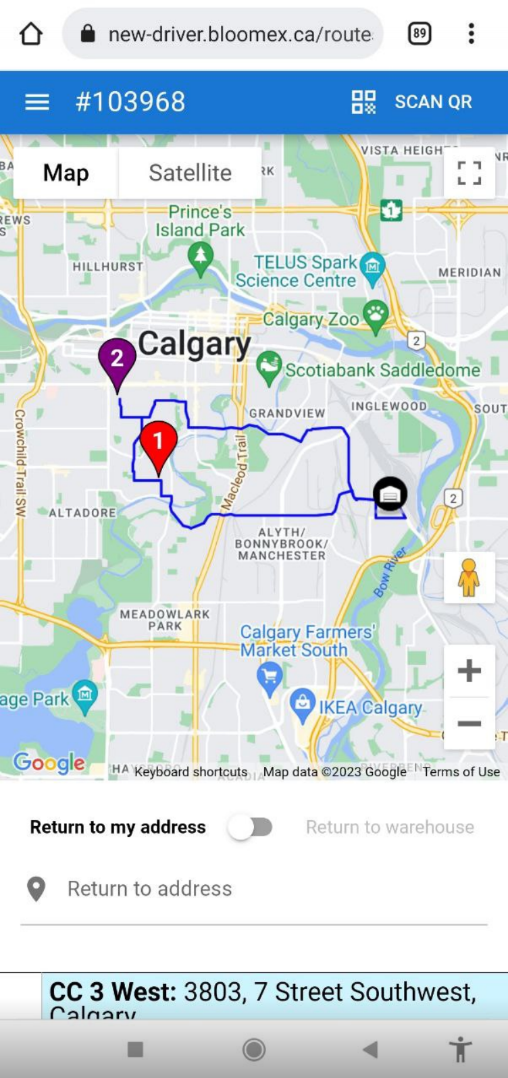
.png)

.png)
8. If you need to add an order click on the “SCAN QR” button

9. Select the number of the created new route in "Select route" on each scan


10. Press the green “TAKE ORDER” button

11. When all orders are scanned press the “CLOSE” button

12. Click on the blue button in the form of 3 bars in the upper left corner

13. Click on the "Route list" button

14. Click on the blue route number that appeared in the “Active Routes” list.

15. Click on the purple “Re-Optimize Route” button (to update the route).

Press this button ONLY after creating a full-fledged route (all orders have been scanned and added to the route)
!!! Please, don’t press this button unnecessary, as this is a paid service from www.google.com/maps for Bloomex.ca
16. Morning orders are prioritized by default. If you NEED to add business orders to the priority - click on the blue button in the form of 3 bars in the upper left corner.

17. Activate those delivery priorities (morning or business orders or both morning and business orders) that you need (check with the warehouse)

18. Click on a part of the map to open a window with a route
19. Click on the purple “Re-Optimize Route” button (to update the route)

!!! Please, don’t press this button unnecessary, as this is a paid service from www.google.com/maps for Bloomex.ca
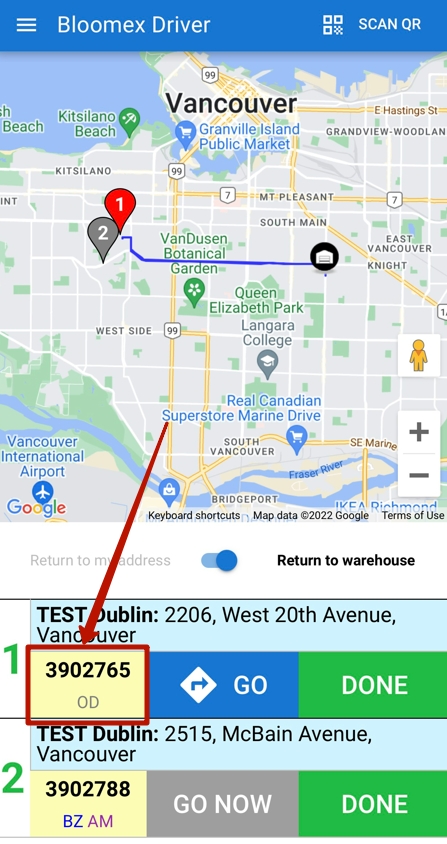
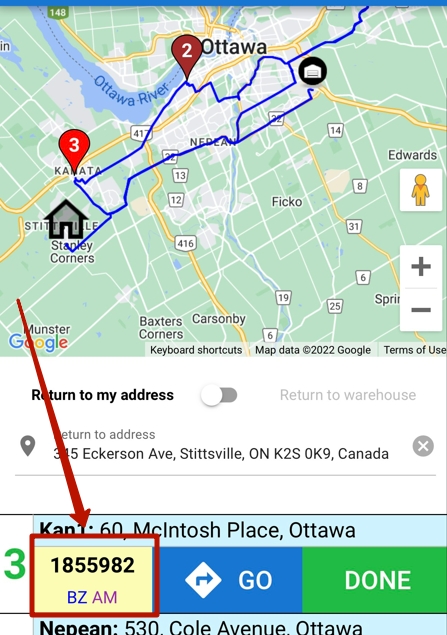
20. Choose between two options where the driver will go after completing all orders (either the address at the discretion of the driver (optional) or the address of the warehouse)

21. Press the blue button ”GO” opposite the order the driver is ready to go to (it is desirable to choose orders in turn)

22. When the delivery is completed - click on the green button "Done" opposite the order number

Delivery
If the order is handed over - press the green button "HAND DELIVERY"

You can leave a comment in the Comment (optional) or choose from the available templates (1).
In the line Receiver's name print the name of the recipient (the one who took the order) (2).
On the line Who received? indicate the person who received the order (recipient, family member, neighbor, concierge, reception, cowoker, doorman, nurse or unit clerk or other option) (3).
Then click on the green “Done” button (4)


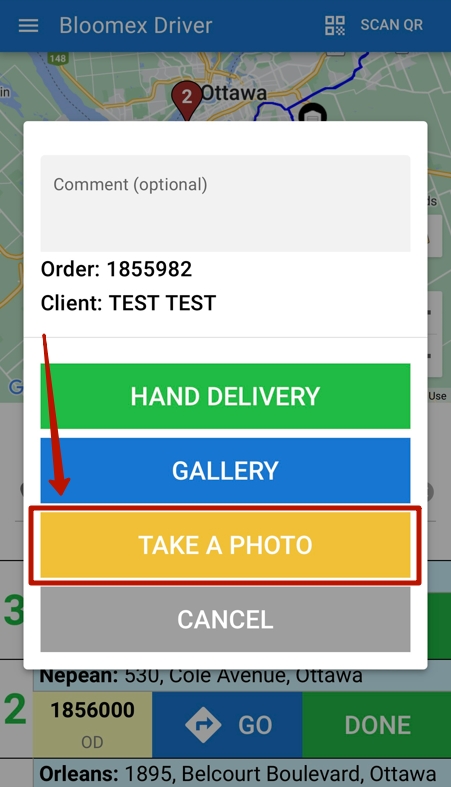
You can upload a photo (for the report). To do this, press the blue GALLERY button. Select a photo from the photo library on your phone to upload and send for delivery report.
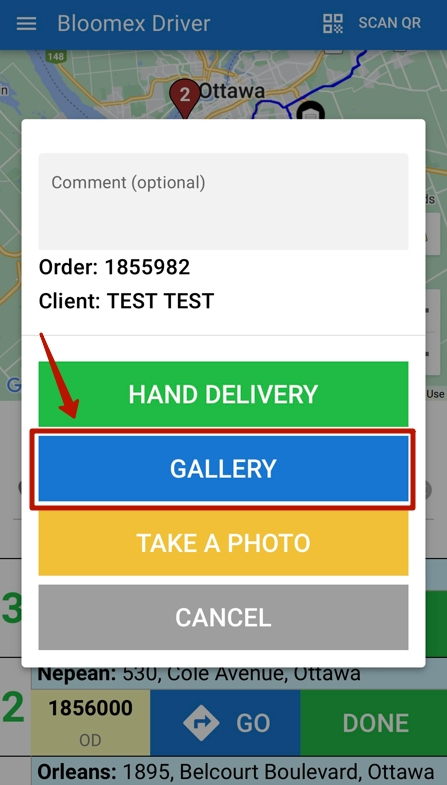

You can immediately take a photo (this photo will be automatically uploaded to the delivery report of the order). To do this, press the yellow button “Take a photo”, take a photo using your phone.

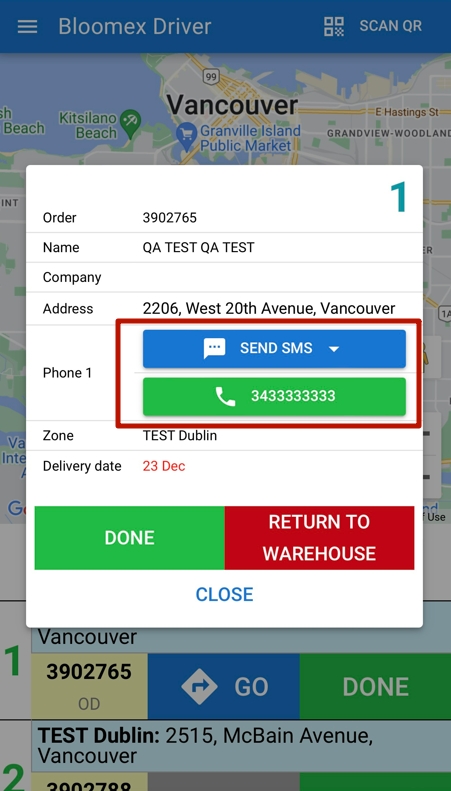
If you click on the order number in the list of orders, a window with extended information about the order will appear.
There are 2 additional actions in this window that can help the driver deliver the order. First action: blue Send SMS button. You can send SMS with the corresponding text. Or the second action: the green Call button. You can call the recipient.


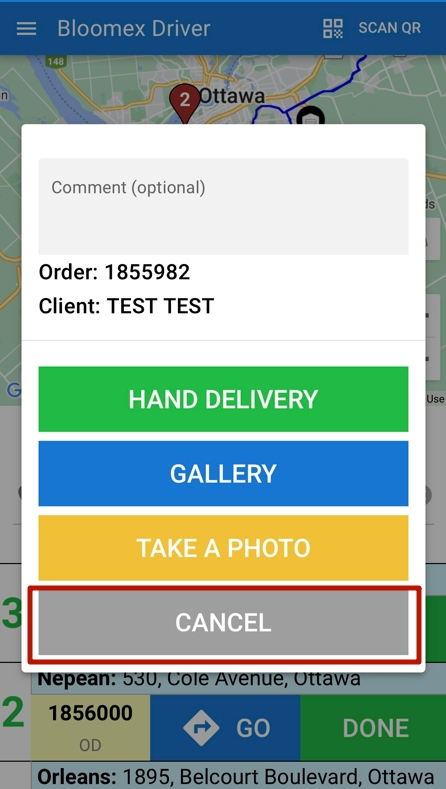
If the green “Done” button was pressed by mistake, then select and press the gray “CANCEL” button in the menu

Return
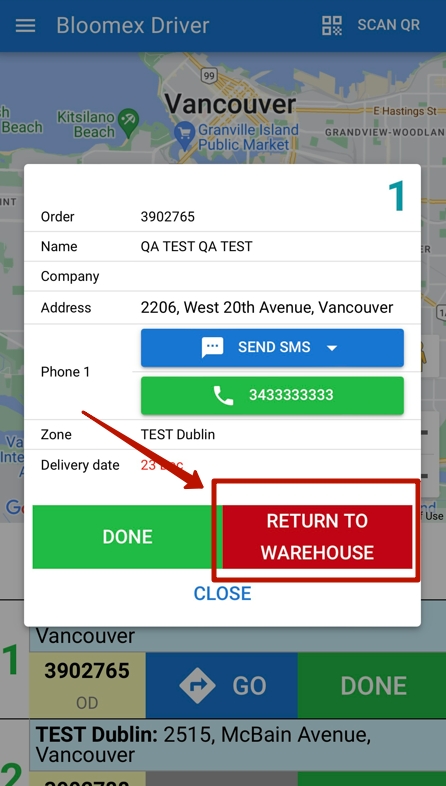
If the order can’t be delivered for various reasons, press on the order number in the list of orders.

Click on the red button «RETURN TO WAREHOUSE»

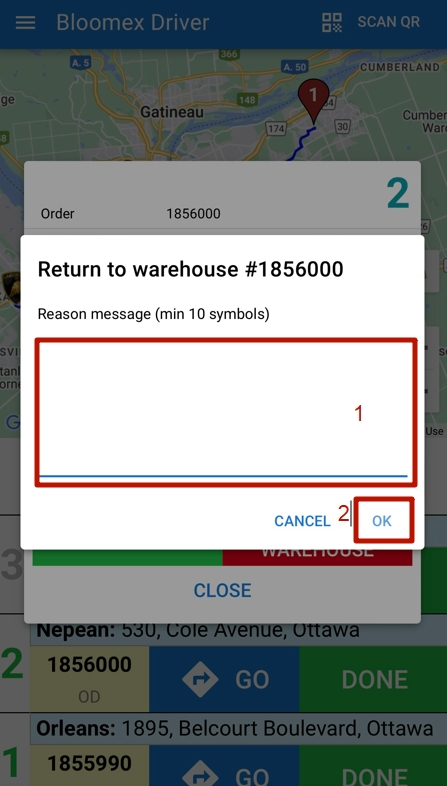
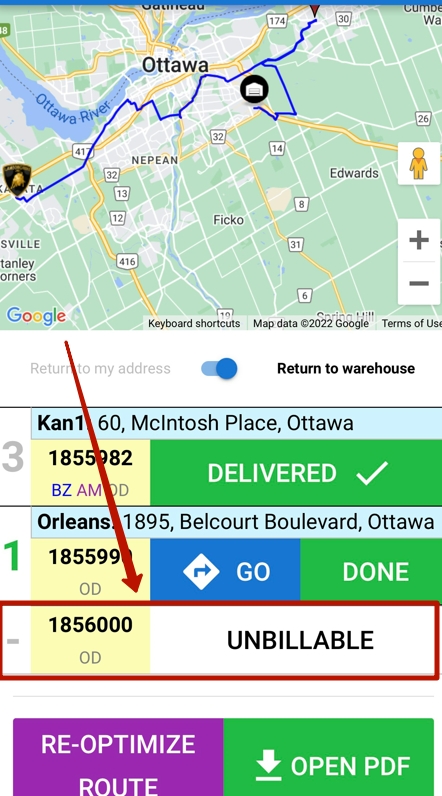
In the window that appears, type the reason for the return (minimum 10 characters) (1) and press “OK” (2)

Order transfer
The second driver can deliver the order that is added to the route of the first driver.
To do this, it is enough to scan the QR code of the order through an open application for drivers, but of a different driver. In this case, the order will disappear from the route of the first driver and appear in the driver app of the second driver

Tips
On the route list screen, there is an option to review the pdf file of the entire route. Here you can see the total length of the route and the total time of the entire route (you need to take into account that these data will be generated at the time of creating the route and may change in case of traffic jams, blocked roads or inability to park near the delivery point)
Markers on the map:
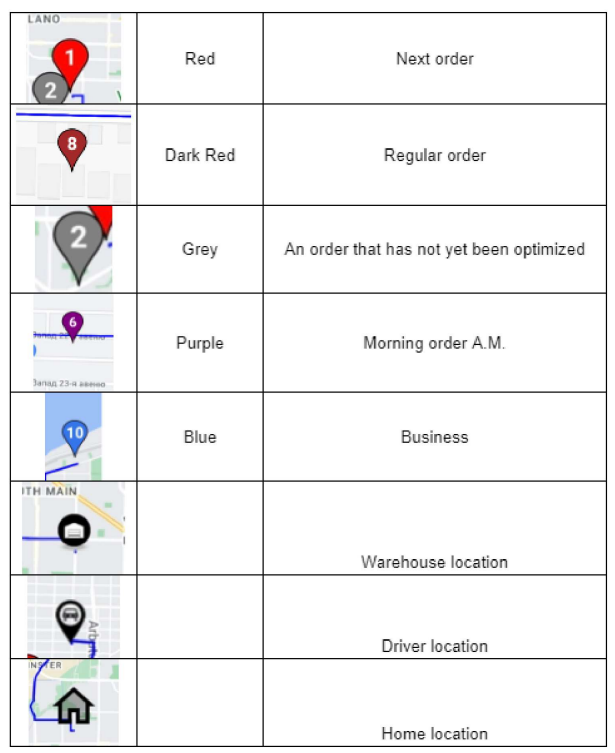

.png)