How to create a ticket: Difference between revisions
Olga Malova (talk | contribs) No edit summary |
Olga Malova (talk | contribs) No edit summary |
||
| Line 3: | Line 3: | ||
[[File:Ticket1.png|frameless|522x522px]] | [[File:Ticket1.png|frameless|522x522px]] | ||
| Line 17: | Line 10: | ||
[[File:Ticket2.png|frameless|684x684px]] | [[File:Ticket2.png|frameless|684x684px]] | ||
| Line 37: | Line 18: | ||
[[File:Ticket3.png|frameless|726x726px]] | [[File:Ticket3.png|frameless|726x726px]] | ||
| Line 63: | Line 38: | ||
[[File:Ticket4.png|frameless|586x586px]] | [[File:Ticket4.png|frameless|586x586px]] | ||
Revision as of 11:19, 6 May 2024
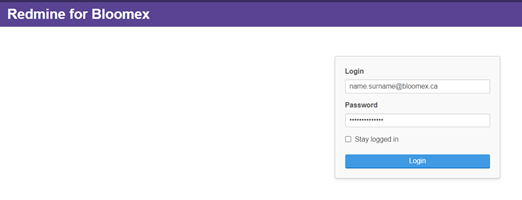
1) Open Redmine website http://tasks.bloomex.ca/redmine/ and login if you are not.
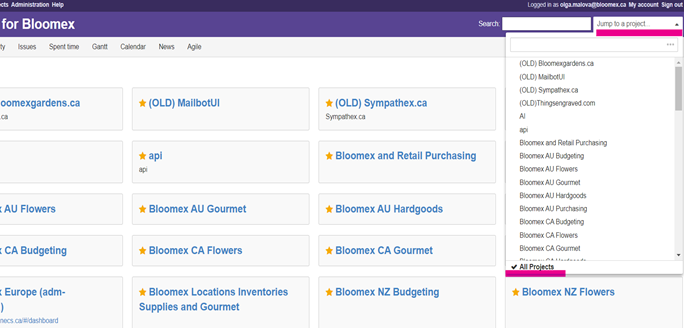
2) Jump to “all projects” in dropdown list on the right-top side.
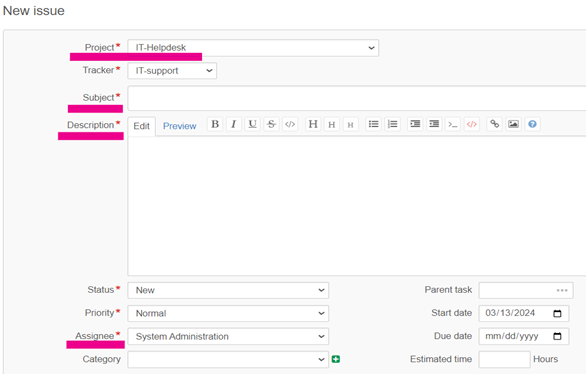
3) Open category “issues” on the left-top side and click the button “New issue”.
4) Now you need to fill in the required fields (they are marked with red star), some of them set up by default and do not need to change values. Please change fields “Project” to IT helpdesk value and “Assignee” to System Administration value. Write down “Subject” and “Description” fields.
There are some useful tips:
- Provide a detailed description of the problem or request.
- Include relevant background information and any steps taken so far.
- Use clear language and avoid jargon if possible.
- Include specific details to help the support team replicate the problem.
- Specify the platform, operating system, and software versions.
- Note any specific configurations or settings that might be relevant.
- Clarify state was expected to happen and what actually occurred.
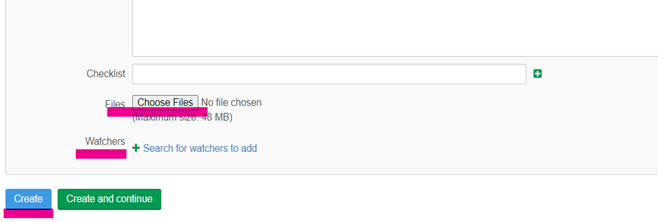
5) Scroll down; here you can upload files, photos and other documents, which could help us to investigate the problem. In addition, you can add people who, you suppose, should be involved in the ticket (your colleague, a project manager etc). Do not forget to press “Create” button to finalize the process.


