Driver Manager
Driver manager
Creating a new warehouse
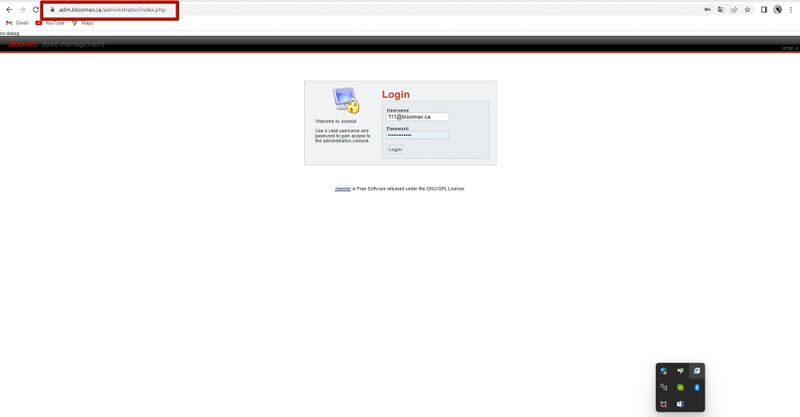
1. Go to https://adm.bloomex.ca/administrator
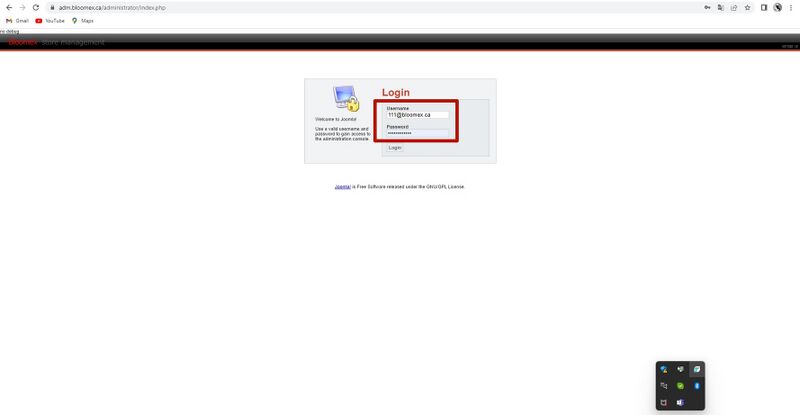
2. Fill in the "Username" and "Password" fields with correct data
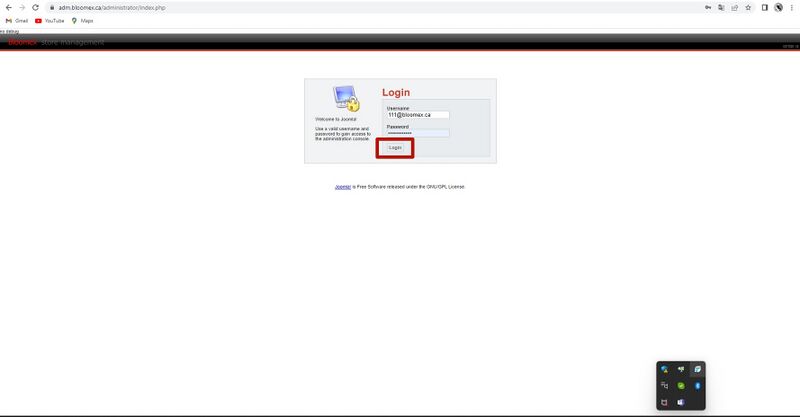
3. Press the blue “LOGIN” button
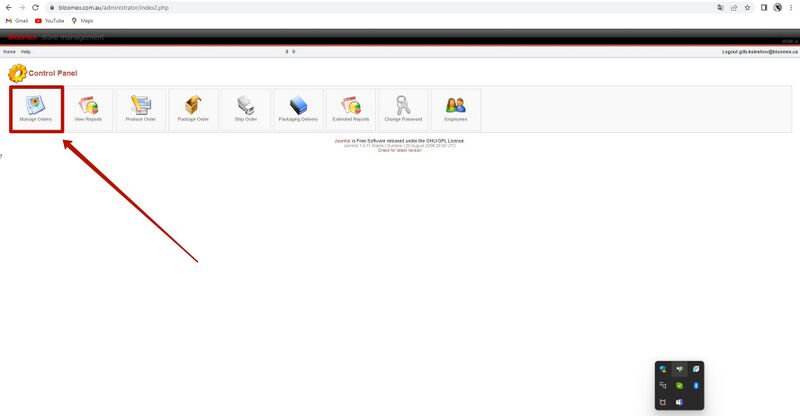
4. Go to the “Manage Orders” module
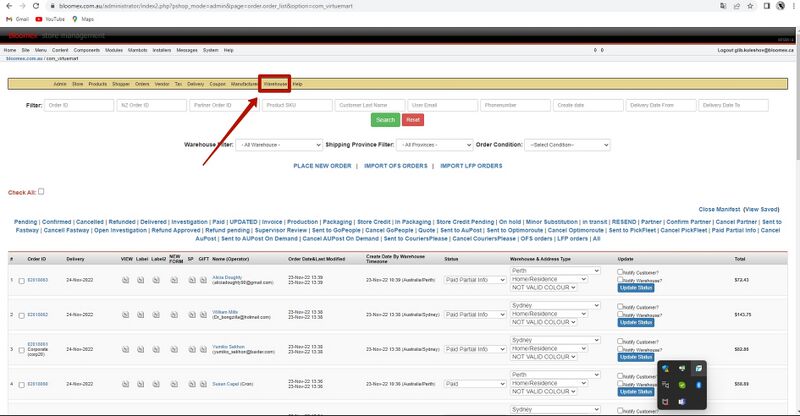
5. Select the “Warehouse” tab and select the “Add warehouse” item
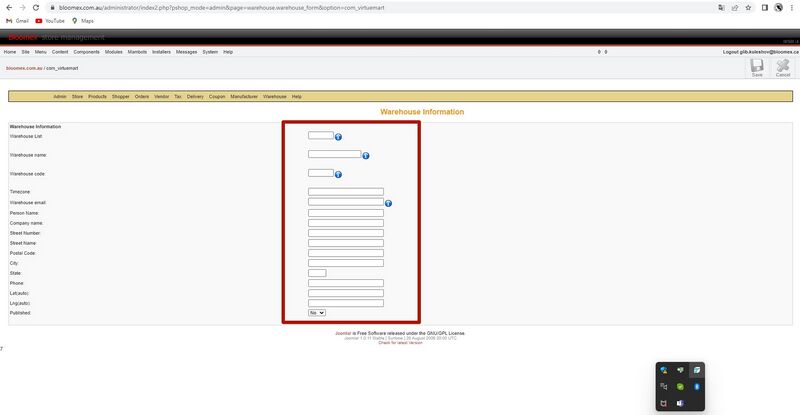
6. Fill in the fields with correct information
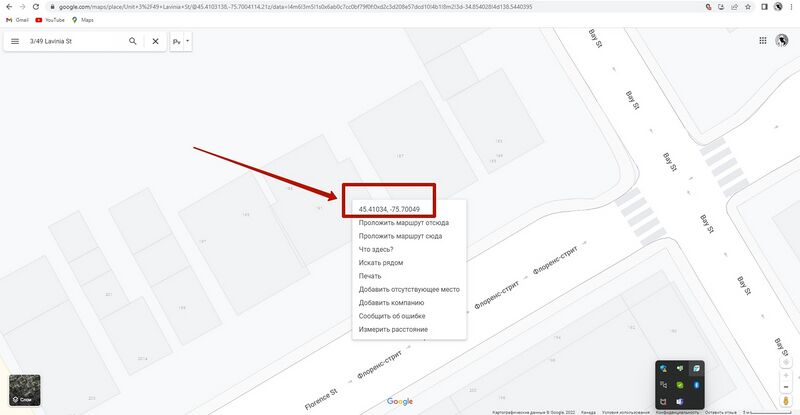
7. Fill in the Lat and Lng fields with the numbers that you received from the site https://www.google.com/maps (right-click on the map)
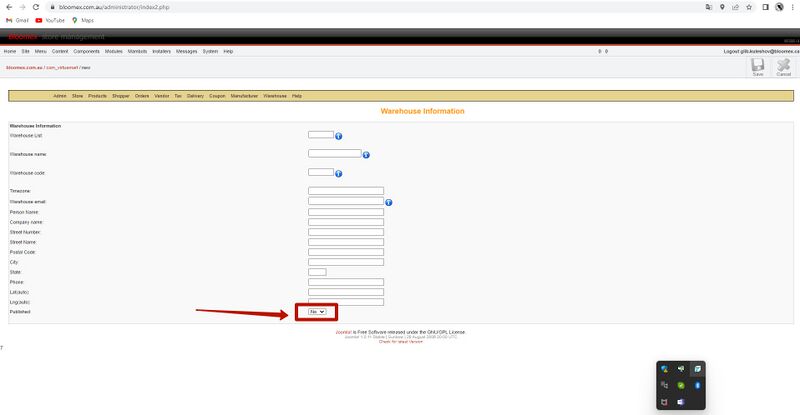
8. In the “Published” item, set the value to “Yes”.
9. Click "Save"
Create a postal zone
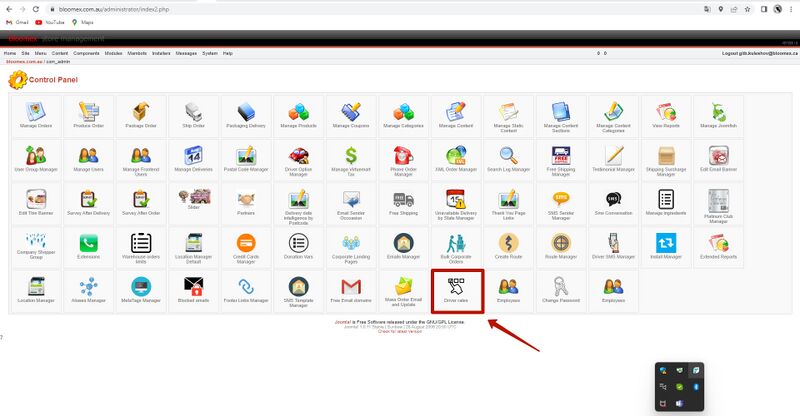
1. Go to the “Driver rates” moduleGo to the “Driver rates” module
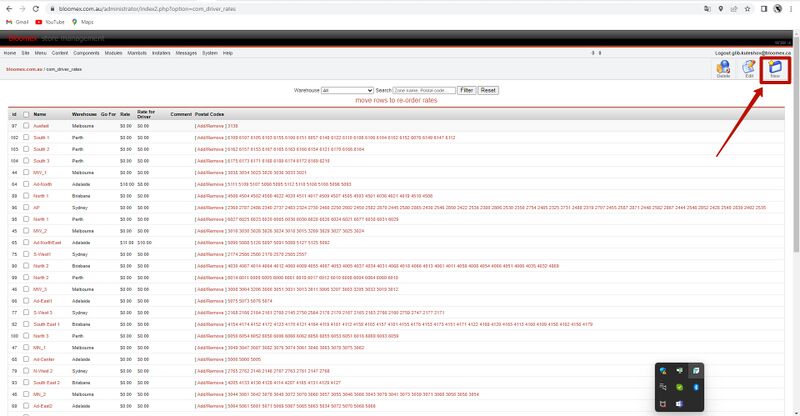
2. Click on the “New” button
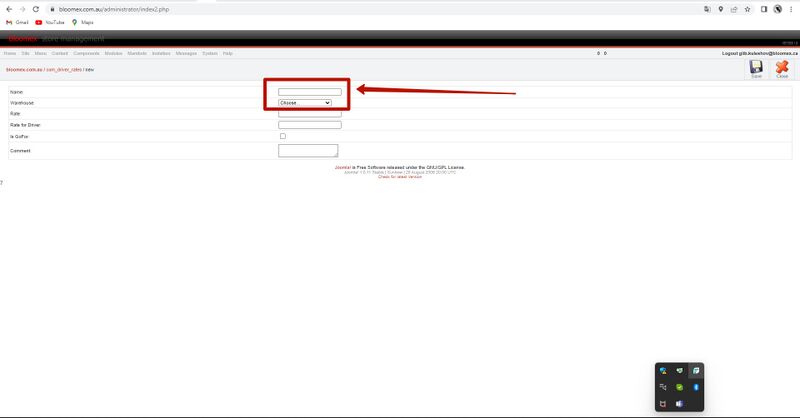
3. Select the warehouse for which the post zone is being created and fill with a name of the postal zone.
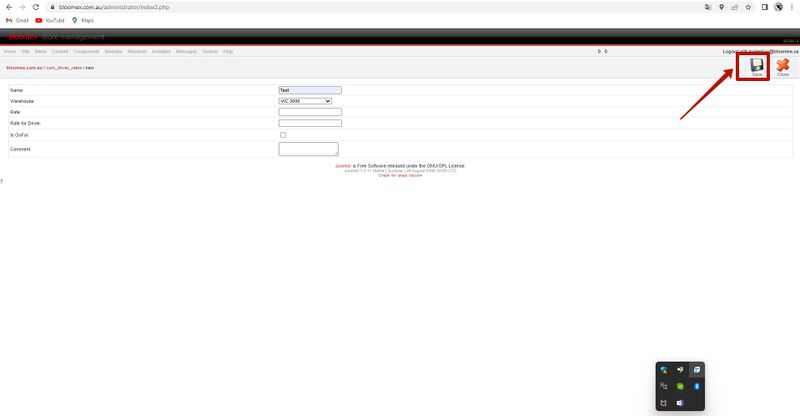
4. Click on the “Save” button
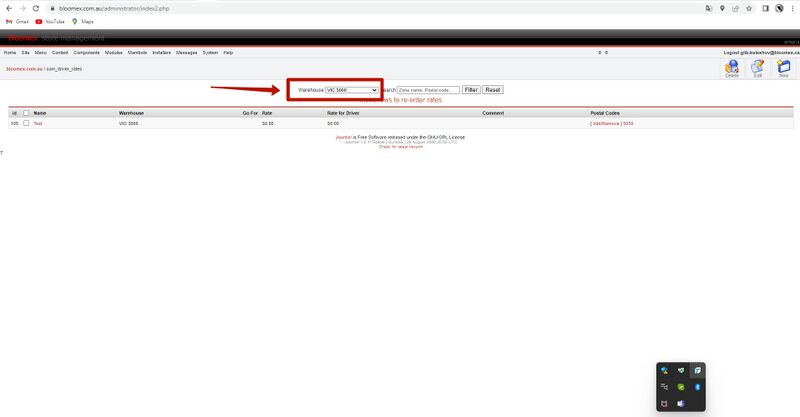
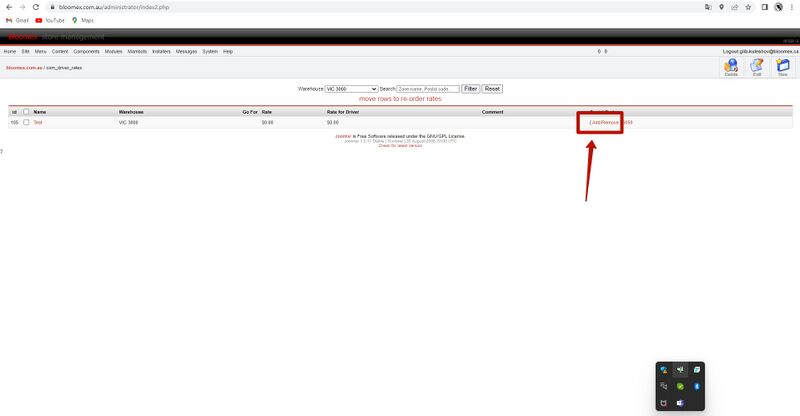
5. Choose warehouse
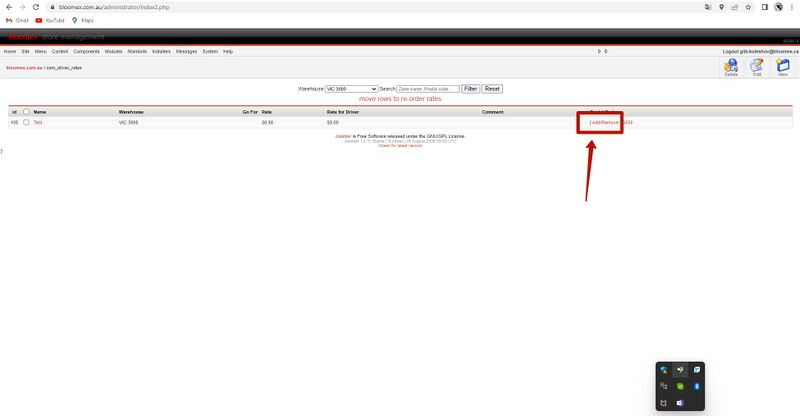
6. Click on “Add/Remove”
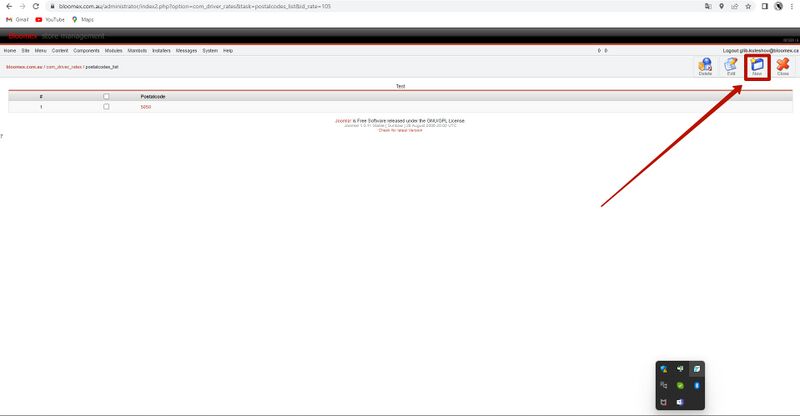
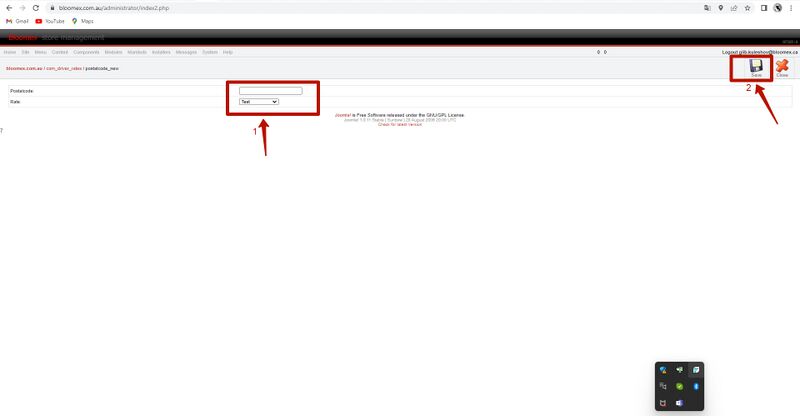
7. Click on the “New” button
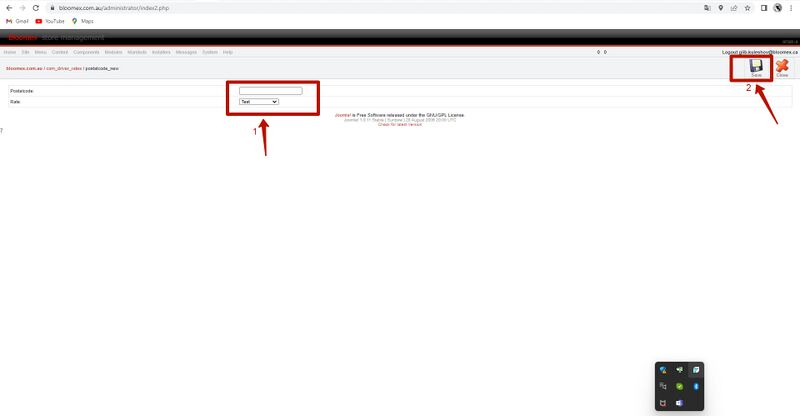
8. Enter in the “Postcode” field the postal code that will be assigned to the previously created postal zone (1) and click “Save” (2)
9. If you need to add another postal code to an existing postal zone, repeat the steps from 5 to 8
Postal code change
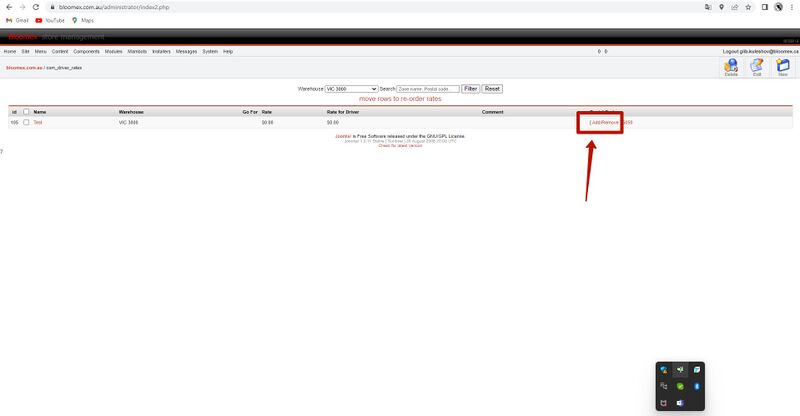
1. If you need to change the postal code - click on “Add/Remove”
2. Select the checkbox for the postal zone in which you want to change the postal code (1) and click on the “Edit” button (2)
3. Change the postal code (1) and click on the “Save” button (2)
Postal code removal
1. If you need to delete the postal code - click on “Add/Remove”
2. Select the checkbox for the postal zone in which you want to delete the postal code (1) and click on the “Delite” button (2)
3. Click on the “OK” button
